网络数据包捕获函数库Libpcap安装与使用(非常强大)
1.Libpcap简介
Libpcap是Packet Capture Libray的英文缩写,即数据包捕获函数库。该库提供的C函数接口用于捕捉经过指定网络接口的数据包,该接口应该是被设为混杂模式。这个在原始套接子中有提到。
著名的软件TCPDUMP就是在Libpcap的基础上开发而成的。Libpcap提供的接口函数实现和封装了与数据包截获有关的过程。
Libpcap提供了用户级别的网络数据包捕获接口,并充分考虑到应用程序的可移植性。Libpcap可以在绝大多数Linux平台上运行。在Windows平台上,也有一款与其功能类似的开发库:Wincap。
它的工作在上层应用程序与网络接口之间。
主要功能:
- 数据包捕获:捕获流经网卡的原始数据包
- 自定义数据包发送:构造任何格式的原始数据包
- 流量采集与统计:采集网络中的流量信息
- 规则过滤:提供自带规则过滤功能,按需要选择过滤规则
它的应用范围非常广泛,典型应用包括玩罗协议分析器,网络流量发生器,网络入侵检测系统,网络扫描器和其他安全工具。
2.Libpcap的安装
Libpcap的下载地址:点击
切换到下载目录,解压压缩文件,配置,编译,安装
cd ****
tar zxvf ****
./configure
make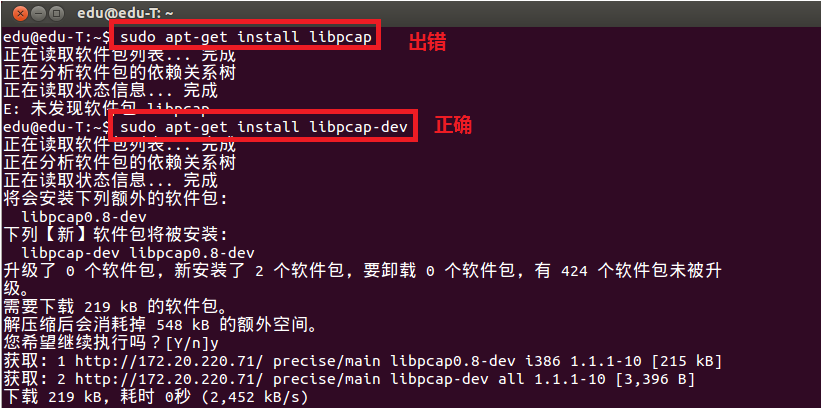
make install配置中如果出现错误,请查看你是否安装了所有的依赖包bison, m4, GNU, flex以及libpcap-dev(安装方法 sudo apt-get ****)
注意运行时候,是需要root权限的 sudo ./***
测试程序:
 View Code
makefile文件:
test: test.c
    gcc -Wall -o test test.c -lpcap
clean:
    rm -rf *.o test
3.Libpcap的工作原理
作为捕捉网络数据包的库,它是一个独立于系统的用户级的API接口,为底层网络检测提供了一个可移植的框架。
一个包的捕捉分为三个主要部分,包括面向底层包捕获、面向中间层的数据包过滤和面向应用层的用户接口。这与Linux操作系统对数据包的处理流程是相同的(网卡->网卡驱动->数据链路层->IP层->传输层->应用程序)。包捕获机制是在数据链路层增加一个旁路处理(并不干扰系统自身的网络协议栈的处理),对发送和接收的数据包通过Linux内核做过滤和缓冲处理,最后直接传递给上层应用程序。

下面介绍Libpcap的抓包流程:
- 查找网络设备:目的是发现可用的网卡,实现的函数为pcap_lookupdev(),如果当前有多个网卡,函数就会返回一个网络设备名的指针列表。
- 打开网络设备:利用上一步中的返回值,可以决定使用哪个网卡,通过函数pcap_open_live()打开网卡,返回用于捕捉网络数据包的秒数字。
- 获得网络参数:这里是利用函数pcap_lookupnet(),可以获得指定网络设备的IP地址和子网掩码。
- 编译过滤策略:Lipcap的主要功能就是提供数据包的过滤,函数pcap_compile()来实现。
- 设置过滤器:在上一步的基础上利用pcap_setfilter()函数来设置。
- 利用回调函数,捕获数据包:函数pcap_loop()和pcap_dispatch()来抓去数据包,也可以利用函数pcap_next()和pcap_next_ex()来完成同样的工作。
- 关闭网络设备:pcap_close()函数关系设备,释放资源。
4.函数功能具体介绍与分析
1.获取网络接口
char * pcap_lookupdev(char * errbuf)
//上面这个函数返回第一个合适的网络接口的字符串指针,如果出错,则errbuf存放出错信息字符串,errbuf至少应该是PCAP_ERRBUF_SIZE个字节长度的
int pcap_lookupnet(const char * device, bpf_u_int32 * netp, bpf_u_int32 * maskp, char * errbuf) //可以获取指定设备的ip地址,子网掩码等信息 //netp:传出参数,指定网络接口的ip地址 //maskp:传出参数,指定网络接口的子网掩码 //pcap_lookupnet()失败返回-1
//net,mask的转换方式,inet_ntoa可以把他转换成10机制字符串 头文件 arpa/inet.h
addr.s_addr=netp;
net=inet_ntoa(addr);

addr.s_addr=maskp;
mask=inet_ntoa(addr);
举例:
View Code
2.释放网络接口
void pcap_close(pcap_t * p)
//该函数用于关闭pcap_open_live()获取的pcap_t的网络接口对象并释放相关资源。
3.打开网络接口

pcap_t * pcap_open_live(const char * device, int snaplen, int promisc, int to_ms, char * errbuf)
//上面这个函数会返回指定接口的pcap_t类型指针,后面的所有操作都要使用这个指针。
//第一个参数是第一步获取的网络接口字符串,可以直接使用硬编码。
//第二个参数是对于每个数据包,从开头要抓多少个字节,我们可以设置这个值来只抓每个数据包的头部,而不关心具体的内容。典型的以太网帧长度是1518字节,但其他的某些协议的数据包会更长一点,但任何一个协议的一个数据包长度都必然小于65535个字节。
//第三个参数指定是否打开混杂模式(Promiscuous Mode),0表示非混杂模式,任何其他值表示混合模式。如果要打开混杂模式,那么网卡必须也要打开混杂模式,可以使用如下的命令打开eth0混杂模式:ifconfig eth0 promisc
//第四个参数指定需要等待的毫秒数,超过这个数值后,第3步获取数据包的这几个函数就会立即返回。0表示一直等待直到有数据包到来。
//第五个参数是存放出错信息的数组。
4.获取数据包
u_char * pcap_next(pcap_t * p, struct pcap_pkthdr * h)
//如果返回值为NULL,表示没有抓到包
//第一个参数是第2步返回的pcap_t类型的指针
//第二个参数是保存收到的第一个数据包的pcap_pkthdr类型的指针
pcap_pkthdr类型的定义如下:
struct pcap_pkthdr
{
  struct timeval ts;    /* time stamp */
  bpf_u_int32 caplen;   /* length of portion present */
  bpf_u_int32 len;      /* length this packet (off wire) */
};
int pcap_loop(pcap_t * p, int cnt, pcap_handler callback, u_char * user)
//第一个参数是第2步返回的pcap_t类型的指针
//第二个参数是需要抓的数据包的个数,一旦抓到了cnt个数据包,pcap_loop立即返回。负数的cnt表示pcap_loop永远循环抓包,直到出现错误。
//第三个参数是一个回调函数指针,它必须是如下的形式:
void callback(u_char * userarg, const struct pcap_pkthdr * pkthdr, const u_char * packet)
//第一个参数是pcap_loop的最后一个参数,当收到足够数量的包后pcap_loop会调用callback回调函数,同时将pcap_loop()的user参数传递给它
//第二个参数是收到的数据包的pcap_pkthdr类型的指针
//第三个参数是收到的数据包数据
int pcap_dispatch(pcap_t * p, int cnt, pcap_handler callback, u_char * user)
//这个函数和pcap_loop()非常类似,只是在超过to_ms毫秒后就会返回(to_ms是pcap_open_live()的第4个参数)
来试试这几个函数,一个简单的例子:
#include <stdio.h>
#include <pcap.h>
#include <time.h>

void capture_packet1(pcap_t* device)
{
    struct pcap_pkthdr packet;
    char errbuf[1024];
    //capture the packet
    const u_char* pkt=pcap_next(device,&packet);
    if(!pkt){
        printf("couldn't capture packet: %s\n",errbuf);
        return;
    }

    //output the pacaket length byte and time
    printf("Packet length: %d\n", packet.len);
    printf("Number of bytes: %d\n", packet.caplen);
    printf("Recieved time: %s\n", ctime((const time_t*)&packet.ts.tv_sec));
}

void getPacket(u_char * arg, const struct pcap_pkthdr * pkthdr, const u_char * packet)
{
    int * id = (int *)arg;

    printf("id: %d\n", ++(*id));
    printf("Packet length: %d\n", pkthdr->len);
    printf("Number of bytes: %d\n", pkthdr->caplen);
    printf("Recieved time: %s\n", ctime((const time_t *)&pkthdr->ts.tv_sec));
    //print packet
    int i;
    for(i=0; i<pkthdr->len; ++i)  {
        printf(" %02x", packet[i]);
        if( (i + 1) % 16 == 0 )
            printf("\n");
    }
    printf("\n\n");
}

void capture_packet2(pcap_t* device)
{
    struct pcap_pkthdr packet;
    int id = 0;
    //capture the packet
    pcap_loop(device,-1,getPacket,(u_char*)&id);
}

int main()
{
    char *dev, errbuf[1024];
    char select='a';
    printf("select(dispaly the packet in detail)/n:( Y/N ?))");
    scanf("%c",&select);
    while(select!='Y'&&select!='y'&&select!='n'&&select!='N'){
        printf("input the error!\nplease input the Y/N/y/n:");
        scanf("%c",&select);
    }

    //look for the net device
    dev=pcap_lookupdev(errbuf);
    if(dev==NULL){
        printf("couldn't find default device: %s\n",errbuf);
        return 1;
    }
    else{
        printf("fidn success: device :%s\n",dev);
    }

    //open the finded device(must set :ifconfig eth0 promisc)
    pcap_t* device=pcap_open_live(dev,65535,1,0,errbuf);
    if(!device){
        printf("couldn't open the net device: %s\n",errbuf);
        return 1;
    }
    if(select=='Y')
        capture_packet2(device);
    else
        while(1)//由于pcap_next()函数只返回下一个数据包的指针
            capture_packet1(device);
    return 0;
}
5.分析数据包
根据不同的网络协议,来设计不同的数据包分析方法,具体参考相关协议的说明。
6.过滤数据包(这部分是非常重要的)
libpcap利用BPF来过滤数据包。
过滤数据包需要完成3件事:
a) 构造一个过滤表达式
b) 编译这个表达式
c) 应用这个过滤器
a)Lipcap已经把BPF语言封装成为了更高级更容易的语法了。
举例:
src host 127.0.0.1
//选择只接受某个IP地址的数据包

dst port 8000
//选择只接受TCP/UDP的目的端口是80的数据包

not tcp
//不接受TCP数据包

tcp[13]==0x02 and (dst port ** or dst port **)
//只接受SYN标志位置(TCP首部开始的第13个字节)且目标端口号是22或23的数据包

icmp[icmptype]==icmp-echoreply or icmp[icmptype]==icmp-echo
//只接受icmp的ping请求和ping响应的数据包

ehter dst 00:00:00:00:00:00
//只接受以太网MAC地址为00:00:00:00:00:00的数据包

ip[8]==5
//只接受ip的ttl=5的数据包(ip首位第八的字节为ttl)
b)构造完过滤表达式后,就可以使用pcap_compile()函数来编译。
int pcap_compile(pcap_t * p, struct bpf_program * fp, char * str, int optimize, bpf_u_int32 netmask)
//fp:这是一个传出参数,存放编译后的bpf
//str:过滤表达式
//optimize:是否需要优化过滤表达式
//metmask:简单设置为0即可
c)最后通过函数pcap_setfilter()来设置这个规则
int pcap_setfilter(pcap_t * p,  struct bpf_program * fp)
//参数fp就是pcap_compile()的第二个参数,存放编译后的bpf
举例:
可以在抓包前,也就是pcap_next()或pcap_loop之前,加入下面的代码:
   //design filter
    struct bpf_program filter;
    pcap_compile(device, &filter, "dst port 80", 1, 0);  //只接受80端口的TCP/UDP数据包
    pcap_setfilter(device, &filter);
5.基于Libpcap实现一个网络数据包嗅探器
基本功能就是来捕获所有流经本网卡的数据包。
实现流程:
- 查找网络设备
- 打开网络设备
- 查找设备信息
- 输入过滤规则
- 编译输入规则
- 设置输入规则
- 开始捕获数据包
- 调用数据包分析模块
- 输出MAC,IP,协议以及数据帧
- 结束
具体实现代码:
#include <stdio.h>
#include <pcap.h>
#include <time.h>
#include <netinet/in.h>
#include <arpa/inet.h>
#include <errno.h>
#include <string.h>

//链路层数据包格式
typedef struct {
    u_char DestMac[6];
    u_char SrcMac[6];
    u_char Etype[2];
}ETHHEADER;
//IP层数据包格式
typedef struct {
    int header_len:4;
    int version:4;
    u_char tos:8;
    int total_len:16;
    int ident:16;
    int flags:16;
    u_char ttl:8;
    u_char proto:8;
    int checksum:16;
    u_char sourceIP[4];
    u_char destIP[4];
}IPHEADER;
//协议映射表
char *Proto[]={
    "Reserved","ICMP","IGMP","GGP","IP","ST","TCP"
};
//回调函数
void pcap_handle(u_char* user,const struct pcap_pkthdr* header,const u_char* pkt_data)
{
    ETHHEADER *eth_header=(ETHHEADER*)pkt_data;
    printf("---------------Begin Analysis-----------------\n");
    printf("----------------------------------------------\n");
    printf("Packet length: %d \n",header->len);
    //解析数据包IP头部
    if(header->len>=14){
        IPHEADER *ip_header=(IPHEADER*)(pkt_data+14);
        //解析协议类型
        char strType[100];
        if(ip_header->proto>7)
            strcpy(strType,"IP/UNKNWN");
        else
            strcpy(strType,Proto[ip_header->proto]);

        printf("Source MAC : %02X-%02X-%02X-%02X-%02X-%02X==>",eth_header->SrcMac[0],eth_header->SrcMac[1],eth_header->SrcMac[2],eth_header->SrcMac[3],eth_header->SrcMac[4],eth_header->SrcMac[5]);
        printf("Dest   MAC : %02X-%02X-%02X-%02X-%02X-%02X\n",eth_header->DestMac[0],eth_header->DestMac[1],eth_header->DestMac[2],eth_header->DestMac[3],eth_header->DestMac[4],eth_header->DestMac[5]);

        printf("Source IP : %d.%d.%d.%d==>",ip_header->sourceIP[0],ip_header->sourceIP[1],ip_header->sourceIP[2],ip_header->sourceIP[3]);
        printf("Dest   IP : %d.%d.%d.%d\n",ip_header->destIP[0],ip_header->destIP[1],ip_header->destIP[2],ip_header->destIP[3]);

        printf("Protocol : %s\n",strType);

        //显示数据帧内容
        int i;
        for(i=0; i<(int)header->len; ++i)  {
            printf(" %02x", pkt_data[i]);
            if( (i + 1) % 16 == 0 )
                printf("\n");
        }
        printf("\n\n");
    }
}

int main(int argc, char **argv)
{
    char *device="eth0";
    char errbuf[1024];
    pcap_t *phandle;

    bpf_u_int32 ipaddress,ipmask;
    struct bpf_program fcode;
    int datalink;

    if((device=pcap_lookupdev(errbuf))==NULL){
        perror(errbuf);
        return 1;
    }
    else
        printf("device: %s\n",device);

    phandle=pcap_open_live(device,200,0,500,errbuf);
    if(phandle==NULL){
        perror(errbuf);
        return 1;
    }

    if(pcap_lookupnet(device,&ipaddress,&ipmask,errbuf)==-1){
        perror(errbuf);
        return 1;
    }
    else{
        char ip[INET_ADDRSTRLEN],mask[INET_ADDRSTRLEN];
        if(inet_ntop(AF_INET,&ipaddress,ip,sizeof(ip))==NULL)
            perror("inet_ntop error");
        else if(inet_ntop(AF_INET,&ipmask,mask,sizeof(mask))==NULL)
            perror("inet_ntop error");
        printf("IP address: %s, Network Mask: %s\n",ip,mask);
    }

    int flag=1;
    while(flag){
        //input the design filter
        printf("Input packet Filter: ");
        char filterString[1024];
        scanf("%s",filterString);

        if(pcap_compile(phandle,&fcode,filterString,0,ipmask)==-1)
            fprintf(stderr,"pcap_compile: %s,please input again....\n",pcap_geterr(phandle));
        else
            flag=0;
    }

    if(pcap_setfilter(phandle,&fcode)==-1){
        fprintf(stderr,"pcap_setfilter: %s\n",pcap_geterr(phandle));
        return 1;
    }

    if((datalink=pcap_datalink(phandle))==-1){
        fprintf(stderr,"pcap_datalink: %s\n",pcap_geterr(phandle));
        return 1;
    }

    printf("datalink= %d\n",datalink);

    pcap_loop(phandle,-1,pcap_handle,NULL);

    return 0;
}
本文转自cococo点点博客园博客,原文链接:http://www.cnblogs.com/coder2012/archive/2013/04/13/3012390.html,如需转载请自行联系原作者
来源:https://yq.aliyun.com/articles/383356
智能推荐
无线网络技术试验——无线局域网数据包捕获与分析
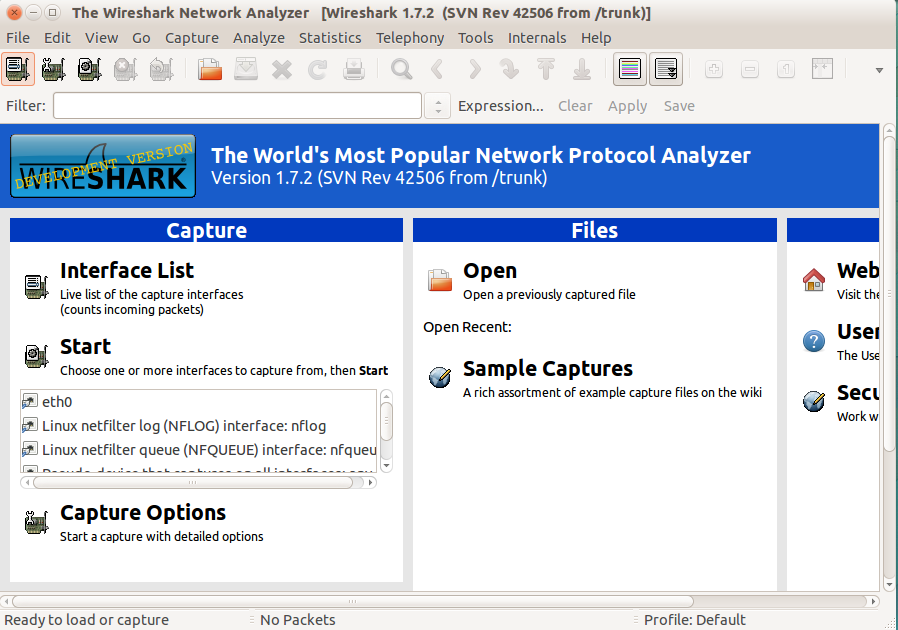
试验目的 熟悉常见的无线测量工具特点和用途 学习Windows上的Wireshark数据包捕获和分析 学习Linux上的Wireshark数据包捕获和分析 试验环境 Wireshark软件、Linux系统 Linux系统因其开放性而更通用,Linux上的无线测量工具较少受到限制,可获得较全面的无线网络测量信息。 Wireshark在流行度、UI等方面都有优势,且兼容广泛。 试验过程 在Linux环...
无线网络技术 实验四 无线局域网数据包捕获与分析(MacBook)
实验四 无线局域网数据包捕获与分析 1 实验要求和目的 ●熟悉常见的无线测量工具的特点和用途 ●学习 Windows 上的 Wireshark 数据包捕获和分析 ●学习 mac上的数据包捕获和分析 2 实验原理和背景 WLAN 无线测量工具可分为 3 类:(1)有线测量工具 改进或衍生,如 Wireshark 和 Mognet;(2)无线环境专用测量工具,如 Kismet、WiFiscanner ...
【无线网络实验】实验四:无线局域网数据包捕获与分析
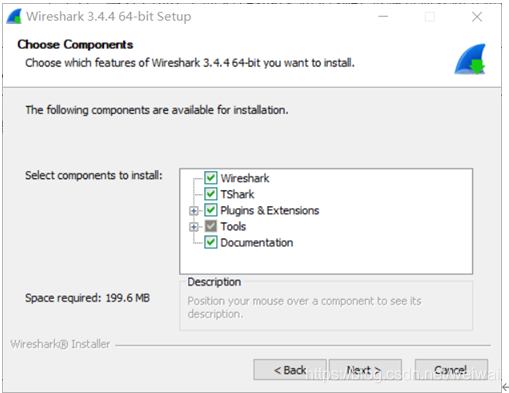
实验过程 Windwos系统下使用Wireshark (1)下载Wireshark(网站: https://www.wireshark.org/download.html),并安装 安装很简单,直接一直下一步就行 点击我连接的wlan进行抓包 WireShark的主要界面 Display Filter(显示过滤器), 用于过滤 Packet List Pane(封包列表), 显示捕获到的封包, 有...
Linux 网络编程—— libpcap库使用详解
概述 libpcap 是一个网络数据包捕获函数库,功能非常强大,Linux 下著名的 tcpdump 就是以它为基础的。 libpcap主要的作用 1)捕获各种数据包,列如:网络流量统计。 2)过滤网络数据包,列如:过滤掉本地上的一些数据,类似防火墙。 3)分析网络数据包,列如:分析网络协议,数据的采集。 4)存储网络数据包,列如:保存捕获的数据以为将来进行分析。 libpcap 的安装 libp...

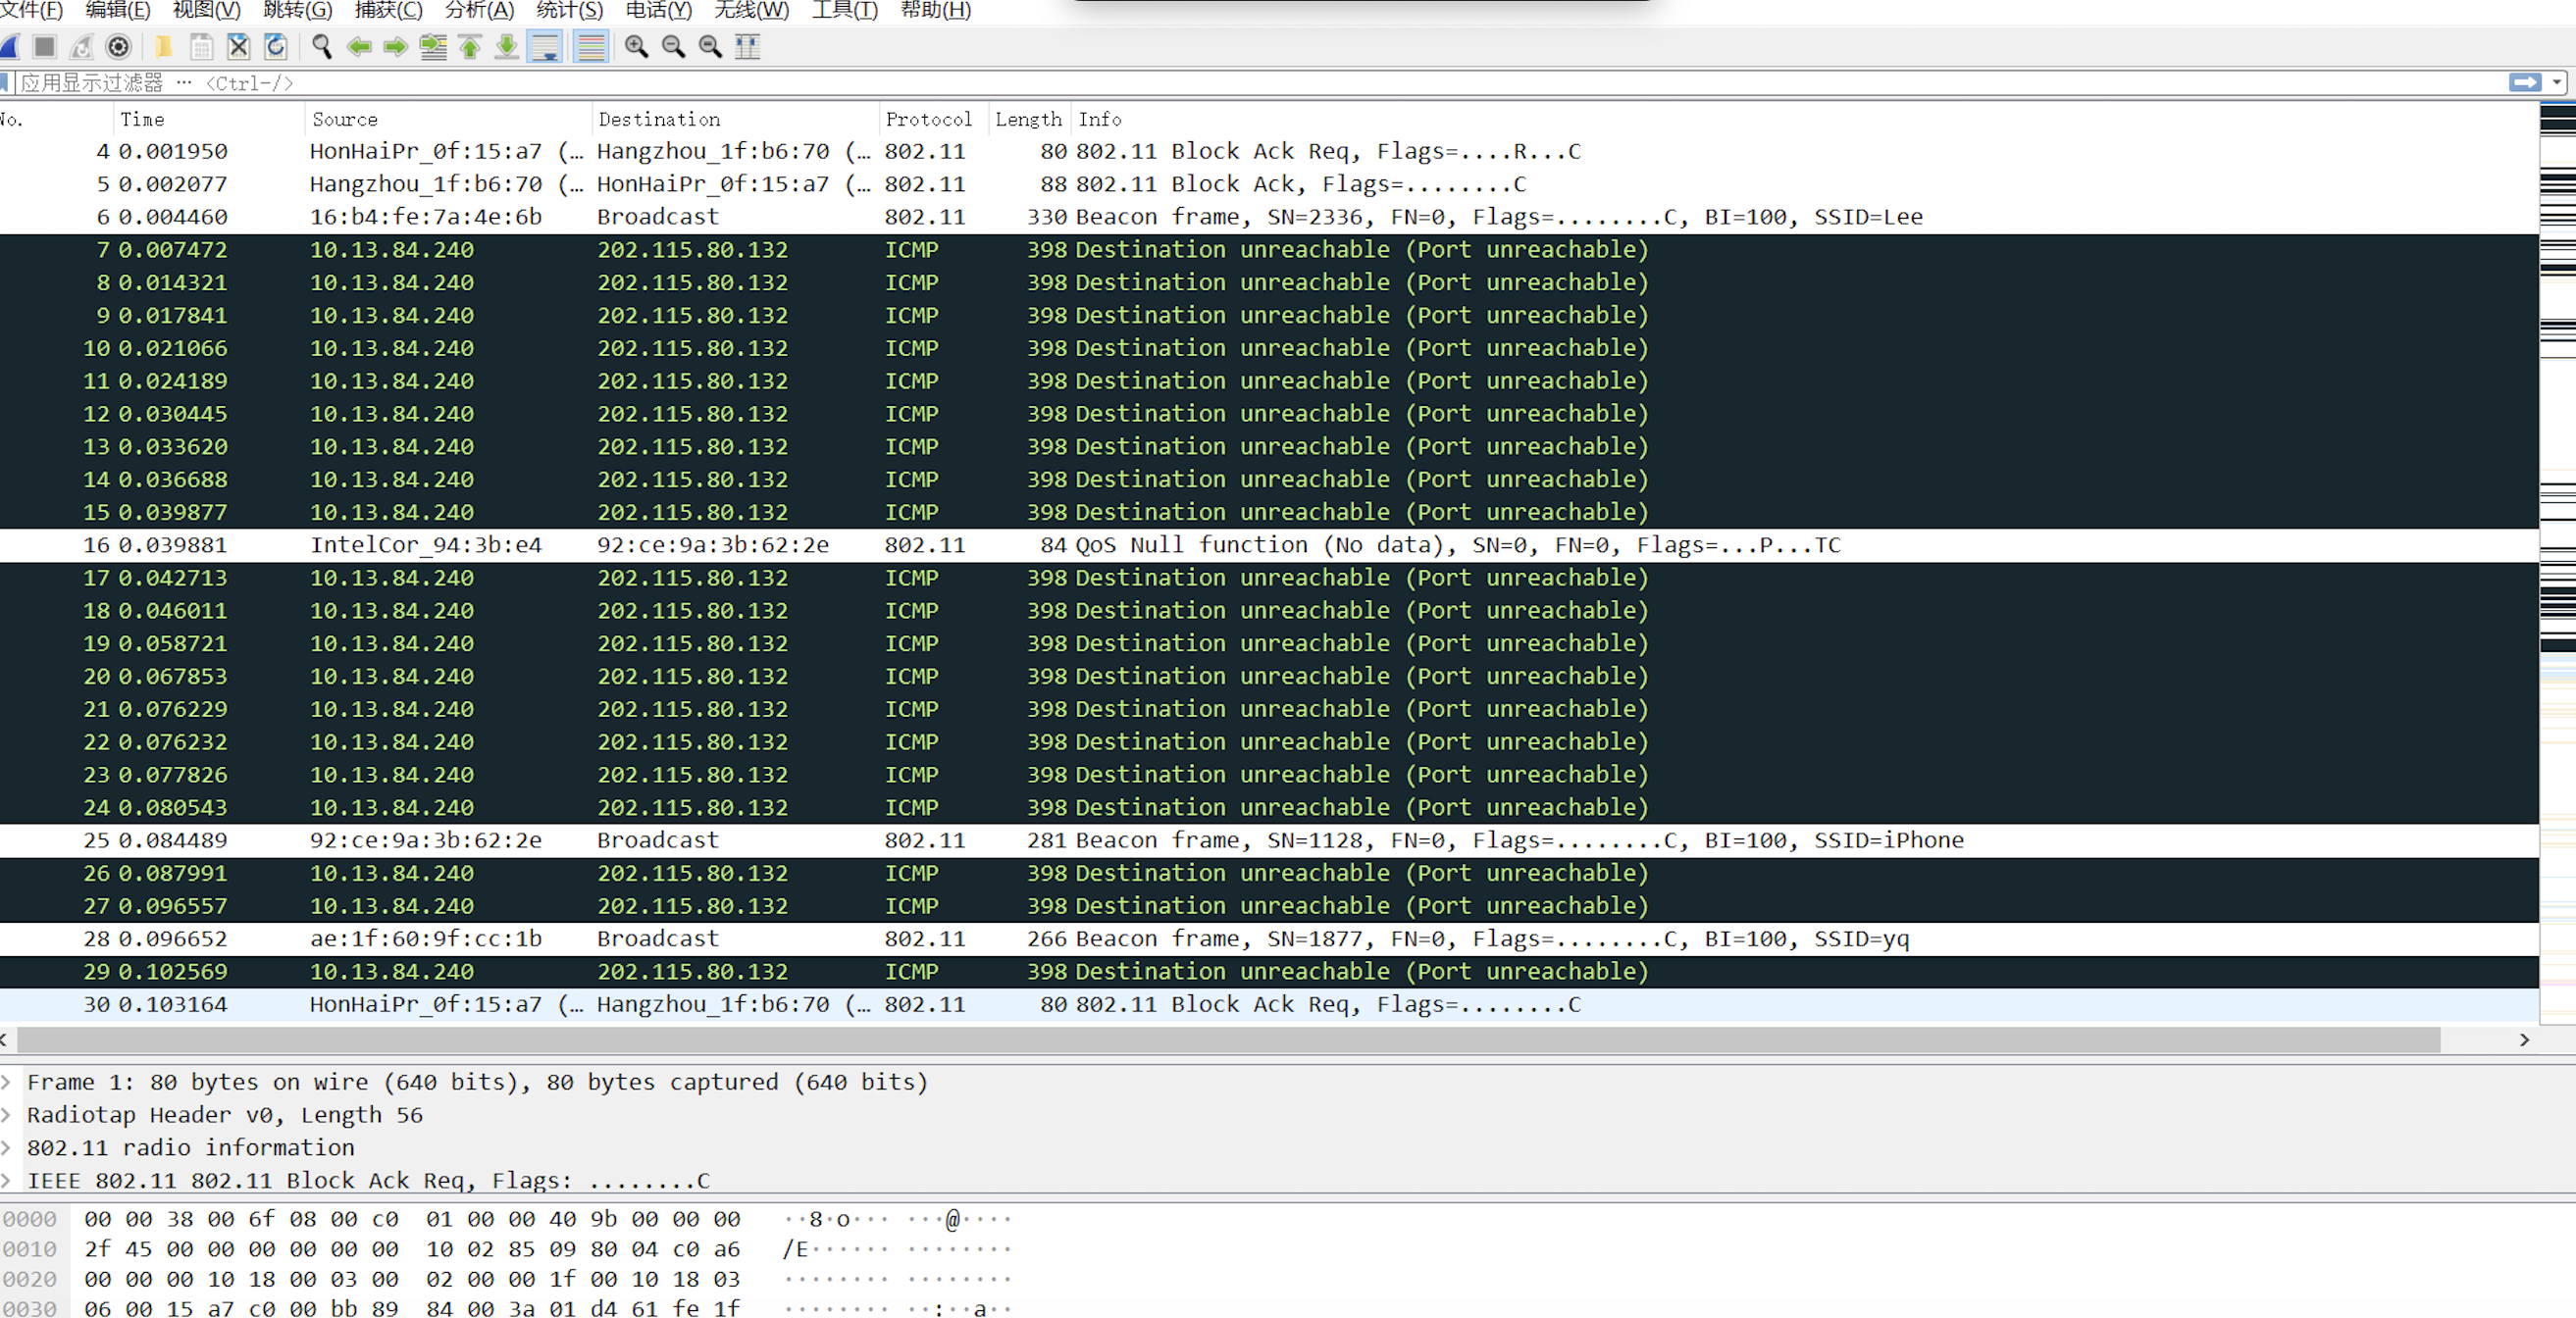
Windows下捕获802.11数据包
摘要:Windows下无法直接用wireshark,原因是因为捕获802.11帧需要设置网卡为监控模式(即monitor mode,非混杂模式),因此我们需要使用microsoft network monitor,微软提供的一个免费检测工具来抓包。 运行环境: 笔记本 + win10 + Microsoft Network Monitor 3.4 + wireshark Microsoft Net...
猜你喜欢
DPDK数据包捕获框架
DPDK数据包捕获框架 本文介绍了如何使用 DPDK 数据包捕获框架在DPDK端口捕获数据包,以供那些希望更多了解其特性或能够监控DPDK控制设备的流量的用户作为参考。 DPDK数据包捕获框架由DPDK pdump库和DPDK pdump工具组成,在DPDK v16.07中被初次引入。 DPDK pdump库和pdump工具 (http://dpdk.org/doc/guides/prog_gui...
在VM虚拟机下 Windows 10备份与恢复
#Windows 10备份与恢复 实验案列: 使用Ghost备份/恢复操作系统 实验背景: XX公司XX部门购置了一批新计算机,软件工程师小杨为给系统快速恢复、批量装机等维护工作提供便利条件,准备使用一台Windows 10样机制作Ghost镜像文件,分发到其他的计算机中,作为故障恢复的样板。 需求描述: 用Ghost软件为Windows 10样机制作备份镜像。将制作的.Gho文件备份到本机的其他...
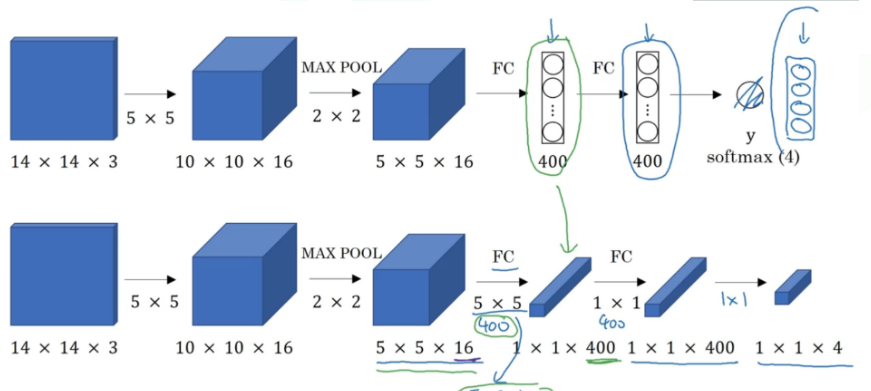
卷积的滑动窗口
他们都可以处理多张不同的图片 但全卷积可以接受其他的输入大小 其实是很简单的东西 搭配这个看 传统的 前面是卷积层+后面是全连接层 输入大小会有限制 这是因为卷积层和全连接层的连接处(图中红圈处),传入全连接层那边大小是被限制死的, 比如这里这个神经网络就是专门为14143而设计的, 如果你输入大小是其他比如16163,那就死定了,因为我们知道卷积层变成全连接层就是把方块flatten打散成一列,...

telnet输入乱码的解决
1、Win+R --- 运行窗口 输入cmd回车 2、输入telnet 主机 端口 3、连接主机发现无法输入 4、这里什么也不要输入,按下 ctrl+] 键 5、按下回车键,然后会弹出新的窗口,就可以正常输入了 6、输入 请求行信息 回车 美句: 生...

通俗易懂的卷积神经网络教程-第三讲
通俗易懂的卷积神经网络教程-第三讲 我们复习一下上一节的内容,我们把一张28*28*1图片矩阵通过2次卷积,两次池化过程给它变成了4*4*12的矩阵。 之后呢,我们就要直接用BP神经网络进行全连接。用什么输入变量进行全连接呢?首先我们把这12个4*4的矩阵的其中第一个(PP1)给展开为一条,一共4*4=16个变量: 1 2 ... 16 接着我们把第二个、第三个...一...
问答精选
Upgrade PostgreSQL from 9.6 to 10.0 on Ubuntu 16.10
My database is over 600 GB and my current volume is only 1 TB, so that probably limits my options. My config files are here: My database is here: Edit - This guide worked for me. The only addition I n...
JSONTypeInfo to not ignore property in inheritance mapping
I am using following dependency for JSON serialization/deserialization I have inheritance mapping. Following is Parent class. And we have two sub class One and Two extended by Parent. This mapping is ...
IOError: [Errno 2] No such file or directory: '123.avi'
I´m writting a script to send emails form a raspberry pi 4 and I want to attach a file to an email via python, but i always get this error. I´m pretty new to python. I know that the file i...
pthread_join fails in forking TCP server when handling multiple clients
I have to create a multithread TCP/IP server which contains a variable to count the number of clients connected (and those which disconnect) and print the number of clients connected when a client con...
Update corresponding object on multiple jquery ajax requests
I have an array of objects I would like to initiate an ajax request for each, and the result of that request should be stored in the corresponding object for that request say I have what is the proper...
相关问题
相关文章
热门文章
推荐文章
相关标签
推荐问答
- JavaScript works fine when pasted in to console, not as bookmark
- Powershell duplicating file information
- Problem with obtaining GET all athlete activities in Strava API v3
- Getting unknown value on Y axis while plotting barplot(Geom_Col)
- PyQt QProgressBar not working correctly due to Python docstring comment length?
- Quarkus startup is complaining about deprecated properties
- Spaghetti plot in R with repeated measurements
- Laravel Simultaneously input one to many in database
- Protractor webdriver-manager error: "WebDriverError: Unable to determine type from: E. Last 1 characters read: E"
- Amazon AWS cost of small basic web